America's most shopped online Christmas lights store!
- About Us
- My Account
- Sign Out
- Sign In
- Help
-
1-866-962-7382
Chat Now


This might be the fastest DIY Christmas decoration you ever make! Using a semi transparent plastic container, string lights and Christmas ribbons you can create a lighted gift box perfect for indoors or out. Customize your design with your favorite light colors, and add festive holiday bows to match your existing Christmas decorations!

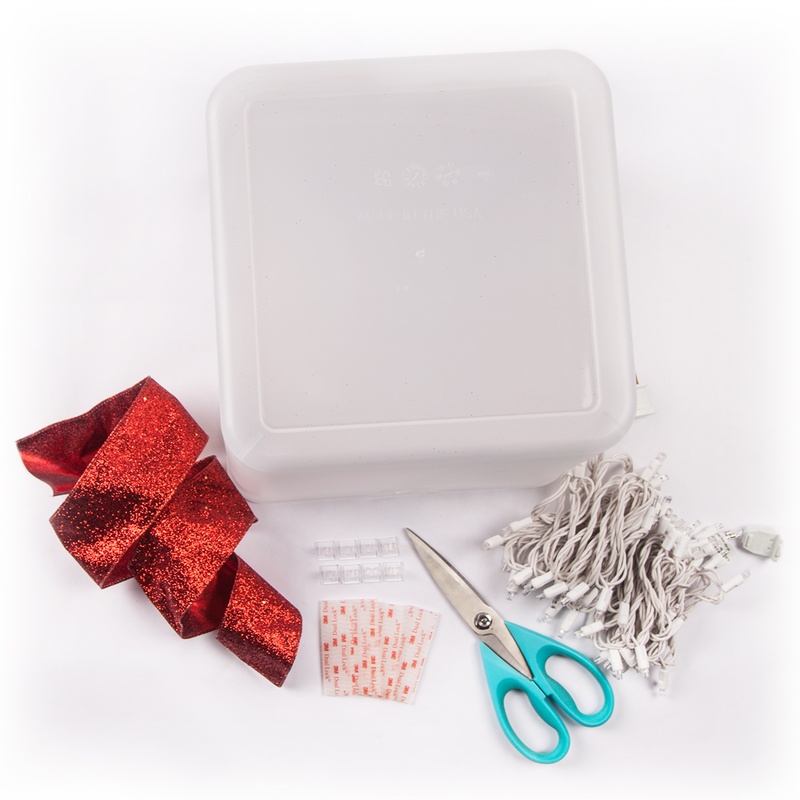
Lighted Gift Box DIY Supplies Needed
For our lighted gift box we used three containers of the same size to create a fun pyramid shape, however you can use larger boxes or different sizes to make your own unique display. Just keep in mind that you may need to add an extra string of lights if you're using a larger box. We wanted our Christmas presents to have a fun candy cane theme so we used 1 strand of cool white LED lights for a bright outdoor glow and wrapped our boxes with shimmering red ribbon and bows! However, this is your DIY project and a perfect chance to flex your creative muscles. Create your own fun Christmas theme or match your boxes to your existing Christmas decorations. Velcro strips allow you to replace the ribbon easily, so you can even change the theme of your lighted presents each year!
Materials and Supplies Needed:
Note: If you can't find a semi transparent container for your lighted present, try making one! Find a clear plastic container and cover it with one or two coats of spray paint formulated specifically for plastic. You can even find paint and primer in one with no pre sanding of the plastic required! Just be sure to pick a paint that will still allow light to shine through and keep your coating thin to create an opaque layer.
Create Your Lighted Gift Box In Five Steps
Step 1: Wipe the inside of your box to clear any dust or debris and stick adhesive clips evenly across the bottom edge of your container. You may want to glue your clips in place to ensure they stay put. Note: adding the light clips helps to create an even glow inside of the box, however you could also place your lights neatly on the ground under your box if you prefer to skip the clips!
Step 2: Stick one velcro strip on each side of your container. You can measure or just eyeball to make sure the velcro pieces are centered on each side and line up across from each other. While your ribbon is still on its spool, wrap it around the box on from one velcro strip to the other with about an extra inch past the velcro strip on each side. Then cut your ribbon and place a velcro strip on one end.
Step 3: Place the velcro end of your ribbon to the velcro on your container and push the two velcro strips together until the connect. From here, place another piece of velcro on top of the velcro on the side opposite the one you just attached the ribbon to and wrap the rest of your ribbon back around as you did in step.
Step 4: Remove the backing from the velcro strip to expose the adhesive underneath, then pull your ribbon tight and place it over the strip, pressing in to make sure the ribbon is secure. Repeat steps 3-5 to attach another ribbon to the other two sides of your container, until the box looks like it is a wrapped present.
Step 5: Snap your lights into the clips, leaving some slack for the plug to reach out of the box. The rest of the lights not clipped in will lay on the ground under your container.
Step 6: If you are just making one lighted gift box, place a bow on top and plug it in! For multiple boxes, have fun stacking and arranging them as you like. When you are all set, plug your light strands together behind the boxes and finish with a bow!