America's most shopped online Christmas lights store!
- About Us
- My Account
- Sign Out
- Sign In
- Help
-
1-866-962-7382
Chat Now

Merry Christmas Sign Planning and Timing
If you have all the materials you need, this is a project that can be done over the course of a weekend if you plan your timing well around the paint drying. We did not. So while it can be done in a weekend, life may get in the way and cause this to take a few extra nights after work. Having all your supplies ready to go is key.
Supply List
Tools
This project actually requires very few tools but if you have power tools it'll go a lot faster. We did the whole thing with basically three tools.
Step by Step: How to Make a Merry Christmas Sign with Lights
Simple Sketch Planning
Draw some Merry Christmas wording on sketch paper to get the look and feel you want for a sign. We chose a font that was a festive script style. Loosely draw circles around the sketch to denote where your lights will go. Add a border. And then try a few more variations on paper until you get a basic look that you like.
Choosing the Sign Board
We went with MDF board rather than plywood because the MDF has a smoother surface for painting. Most hardware stores will cut it on sight for you. We went with a dimension of around 2' tall by 4' wide.
Border Molding
We had 12' of base molding at the house already. It was compressed fiber wood style molding so it's lightweight, cuts well and paints well. We did 45 degree angle cuts on the molding to fit it together around the edge of the sign, which creates the look of a border. Basically we cut two 4' pieces and two 2' pieces, each with 45 degree angles where the edges meet.
Painting and Poor Planning?
The key to doing a project like this is timing your steps well...which we didn't do with the painting, initially. Sigh. Ideally, once you have your sign board and your molding ready, you should paint them immediately. We chose to prime the sign board first and then paint a couple coats of Christmas red on it. We painted the border molding black. We used flat paint on purpose for the sign because we knew we were going to paint a layer of polyurethane on it at the end to give it a little depth and shine.
Sketching the Merry Christmas Sign Lettering
After the paint was dry we took a pencil and began lightly sketching "Merry Christmas" on the sign. By doing it this way we could easily fix mistakes and use it as a guide for the painted letters. We also measured and drew marks where we needed to drill holes for the light sockets.
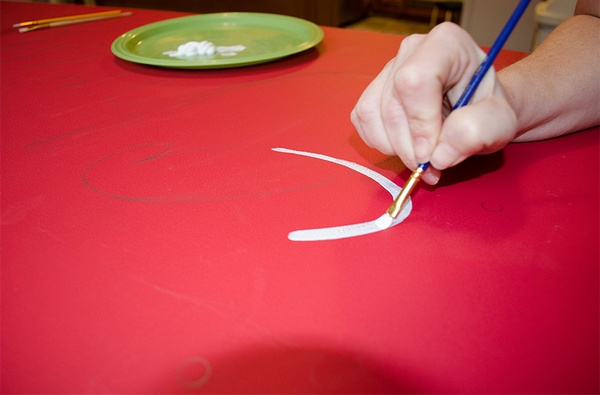
Painting the Lettering
We took a very small paint brush and painted the lettering white. However, in order to make the Merry Christmas sign lettering stand out well, we also wanted to add a black outline to the lettering. With a regular brush, this would have been difficult, however, we found a great alternative called a paint marker. It's shaped like a marker and it lets you apply paint like you're drawing rather than painting. This was a big help because it made all our outlines nice and neat. We highly recommend it.
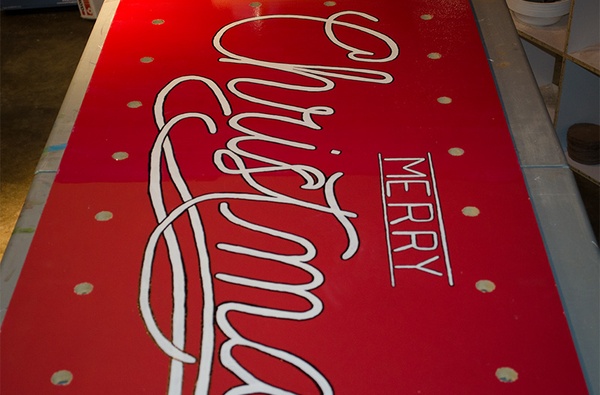
Drilling the Light Socket Holes
With the sign painted we used a 1/2" spade bit to create holes big enough for an C7 socket (E12 base size) to fit through. Since our holes were previously measured and marked in pencil on the sign board it was pretty easy to move around the sign and cut the holes. We chose to space our sockets about six to seven inches apart, which created 16 socket holes.
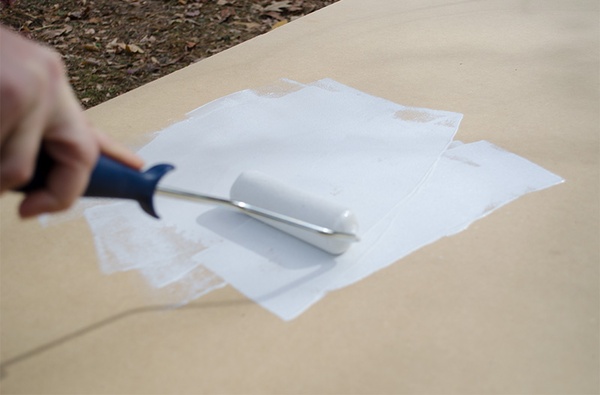
Add a Magic Clear Coat
We rolled a layer of polyurethane across the sign to give the sign more depth and a little sheen...but not too much sheen. We had the urge to place numerous layers of clear coat but ultimately chose not to because we didn't want the sign to be so reflective that it became unreadable.
Easy Border
With the border molding previously cut, painted and dry fit, we used construction adhesive to glue it to the top surface of the sign. While we used clamps to hold these in place, you could also use heavy books or weights as well. The glue we used set pretty fast. In about 20-30 minutes we were carrying the sign around to install the light strings.
Merry Christmas Sign Lighting - In Less Than 15 Minutes!
There's a number of ways to string light sockets. You can custom make every length between the sign holes using zip cord and zip sockets -- but most people don't have that or the time. Or, you can simply by pre-made light stringers. They typically come in a host of sizes with numerous socket spacing options. We chose a 25 socket stringer with 12" spacing. Now you may say to yourself...wait a minute...there's only 16 holes. By getting a light stringer with extra sockets it actually allowed us more slack around the back of the sign to place the sockets with ease. The ones that were left over on the end were simply tied up out of sight. This made lighting the Merry Christmas sign very easy. It took less than 15 minutes to string the sockets through the back and insert the bulbs.
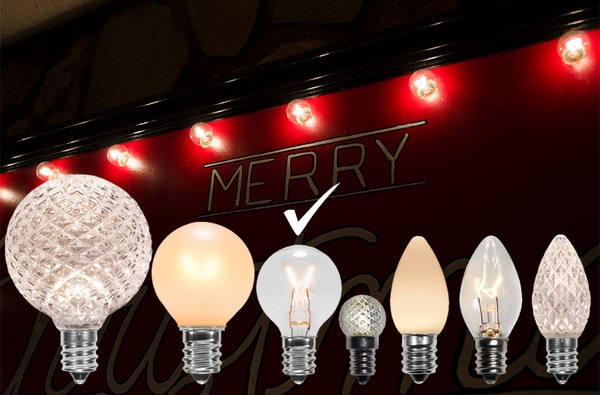
Choosing the Right Sign Bulbs
Bulb choice comes down to personal preference. We thought about using regular C7 Christmas bulbs, but thought they didn't look marquee sign enough. We looked at globe bulbs ranging from G20, G30, G40 and G50. The G50's and G40's are too big for this size sign and the G20s were too small, so we opted for the G30. Lastly, there's a lot of neat finishes you can get these bulbs in, from diamond faceted LED style bulbs, to opaque, to frosted pearl to clear. No doubt, many of these could look good and we might change them out every year to give the Merry Christmas sign a little different look. For this project though we opted for the clear finish G30s, which is an incandescent bulb.
The Moment of Truth and Enjoyment
We didn't waste time placing the sign on the mantel. Plugged it in...and we all just smiled. It looked better than we had hoped. It had it's own style and magic to it. It embodied a little bit of that Christmas spirit we were hoping to achieve and it set a great tone for the room as well, complimenting the Christmas tree and other decorations. It was immediately special and we loved it!

If you're making a lighted Christmas sign and need a little help along the way or have another fun DIY lighting project idea, let us know in the comments below!